The White Canvas - Part 1
Step-by-step guide to create a completed sketch when you are uninspired
The sun is shining. Birds are chirping. And you have made yourself a cup of fresh brew coffee. You sit down at your desk.
Today is the creative day.
You are so ready to create an awesome painting. And… your mind went completely blank, staring at the scary WHITE CANVAS.
Does this sound familiar? Have you ever experienced this? Everything is ready except YOU.
I think you might be interested in how I come up with ideas and the steps I take to create an illustration from start to finish. I’m going to break it down into 2-3 posts so you won’t be overwhelmed by all the information.
Where to find Inspiration?
I am often asked Where do you find your inspiration?
Ideas often play hard to get. They come and go quickly, so whenever they appear, I make sure to mark them down—jotting them on my phone, taking a photo, drawing or writing in my sketchbook, on tissue paper, or even on my arms(make sure you are not using Sharpie!). If I have my iPad with me, I would make a very rough draft in Procreate.
I have a habit of capturing interesting things in my life (I’m sure everyone does that now, with a smart phone in our hands). Therefore, I know where to find inspiration when I want to create something—the photo album on my phone.
Compared to finding references on the internet, looking for inspiration in your own photo album is like having tailor-made content just for you. You took that photo for a reason. It might be something that interested you, awesome colour palette you found in a coffee shop or a hilarious sign you saw in town. Personally, I feel more connected to the art I create using my own references.
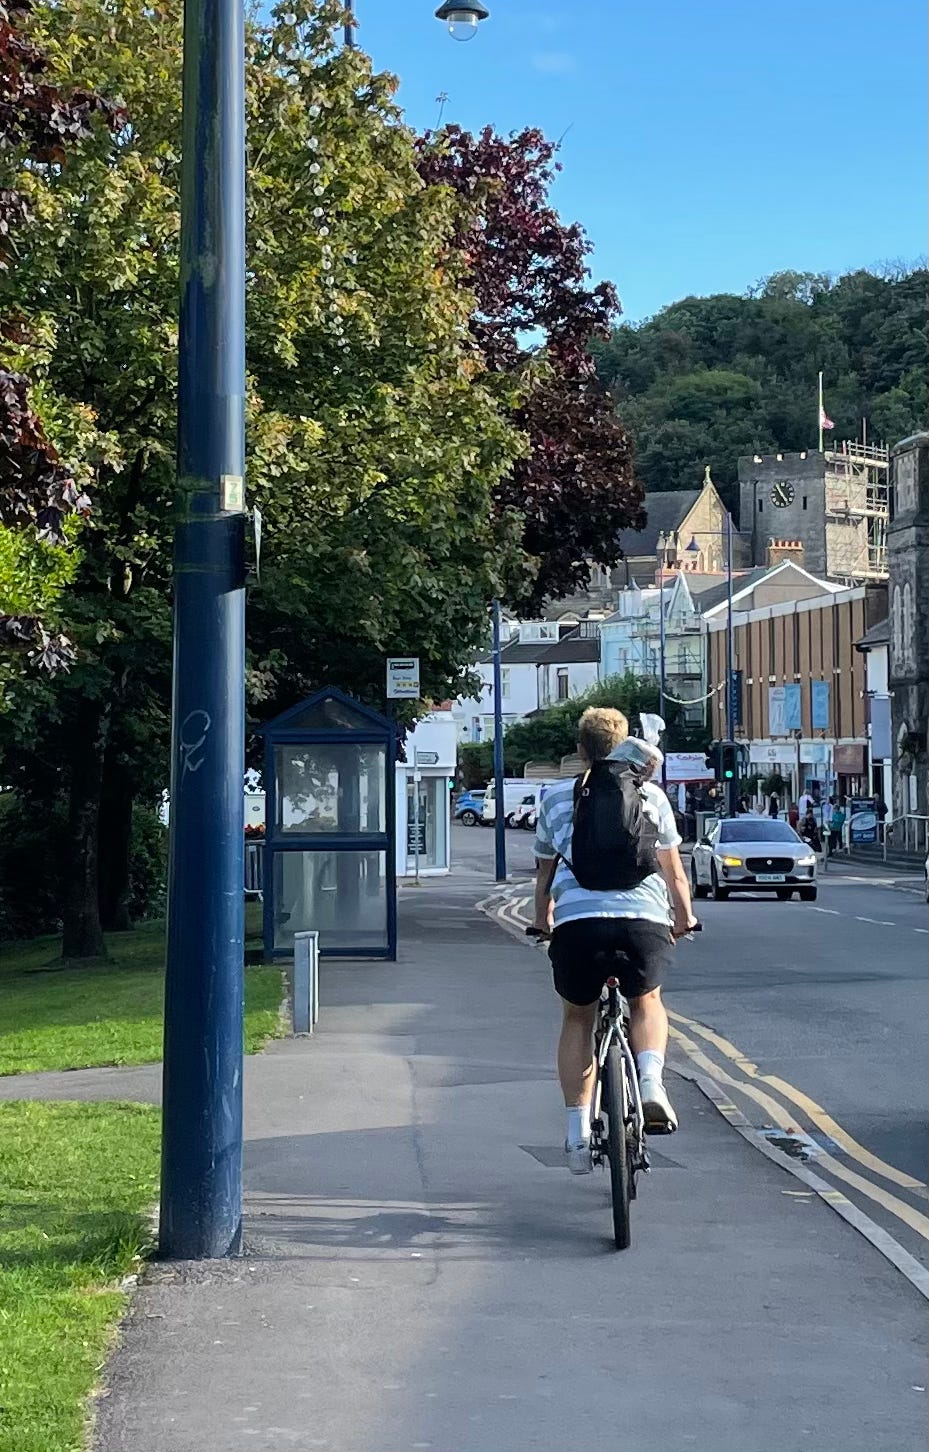
This photo was taken in Swansea, England, back in 2022 and I was inspired by it. I decided to create a character who is riding a bike, with a baguette on his back.
Step 1 - Concept Sketches (thumbnails)
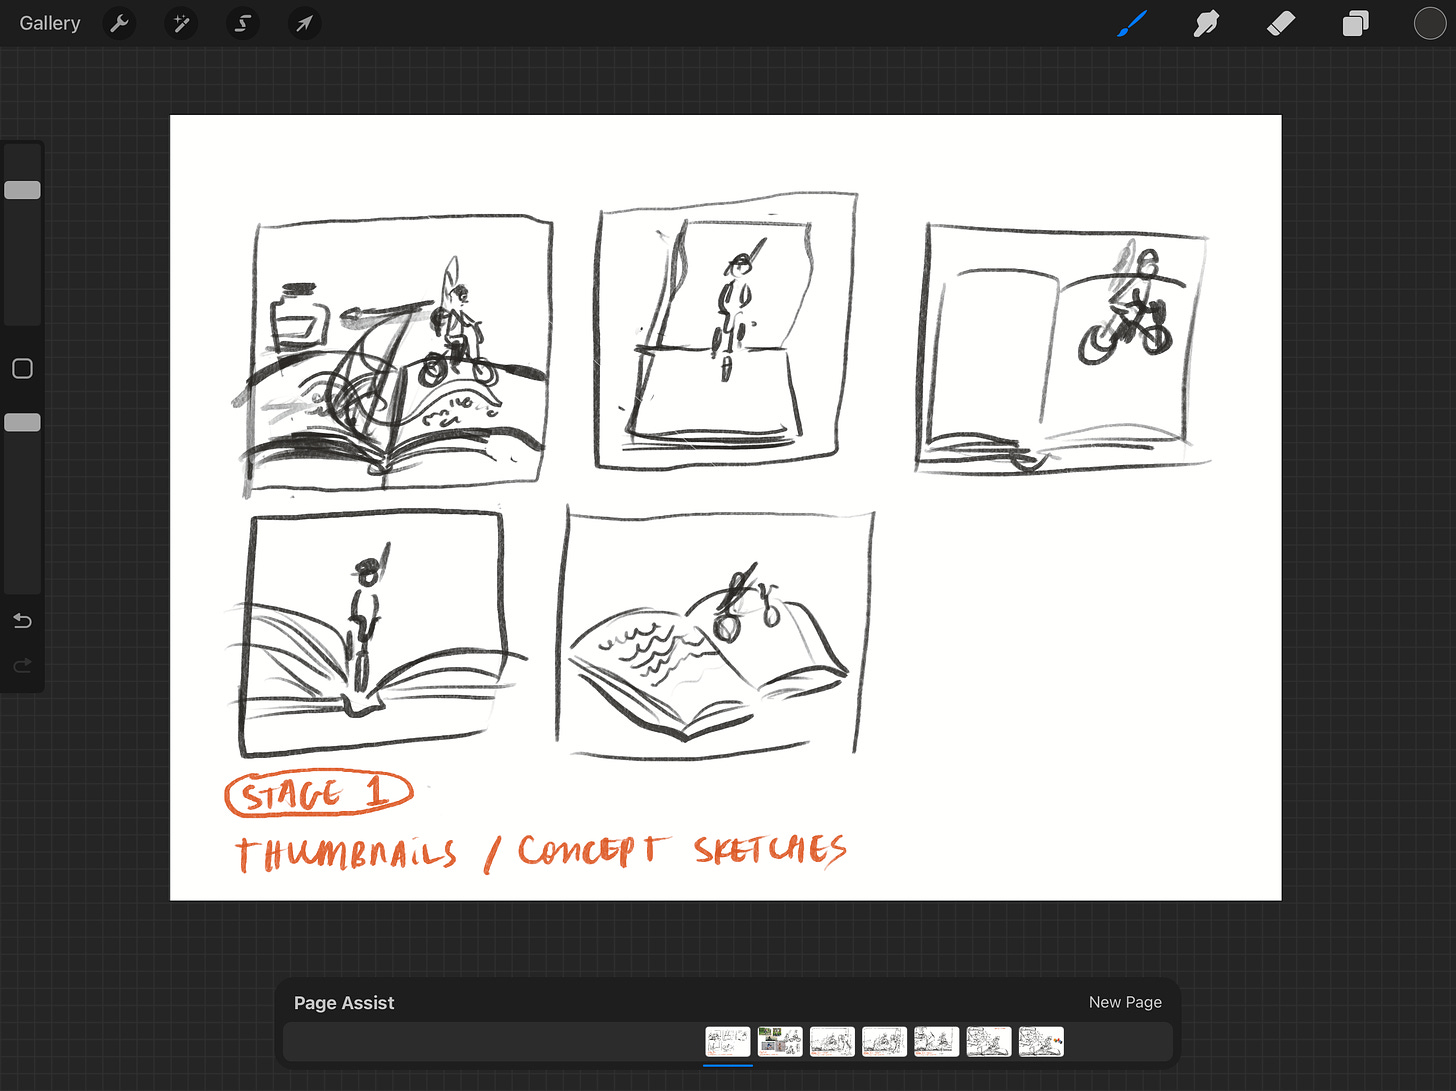
I have a rough idea of what to draw now, and it’s time to create some thumbnails. Thumbnails are small, rough sketches used mainly to decide the layout and composition rather than focusing on details.
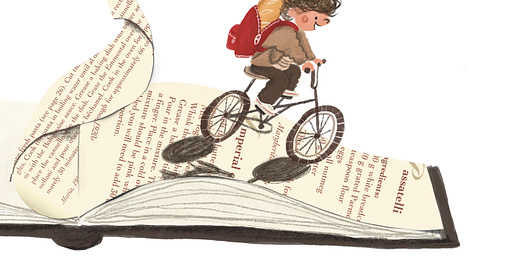
At this stage, I have decided that my character is a baker riding his bike on a recipe book to complete his culinary journey. As you can see, I have come up with five thumbnails that I think might be compelling.
How do you come up with different thumbnails? I love to imagine myself holding a camera and filming my character from different perspectives. Would you zoom in or out? Use a side view or a front view? Would the layout be more interesting if filmed from the top?
The key to this step is to be open-minded.
Put down everything, every possibility in your mind, on paper (or your tablet) before your brain starts analysing them. Don’t overthink it. Overanalysing kills creativity.
Step 2 - Observational Drawing (drawing from reference photos)
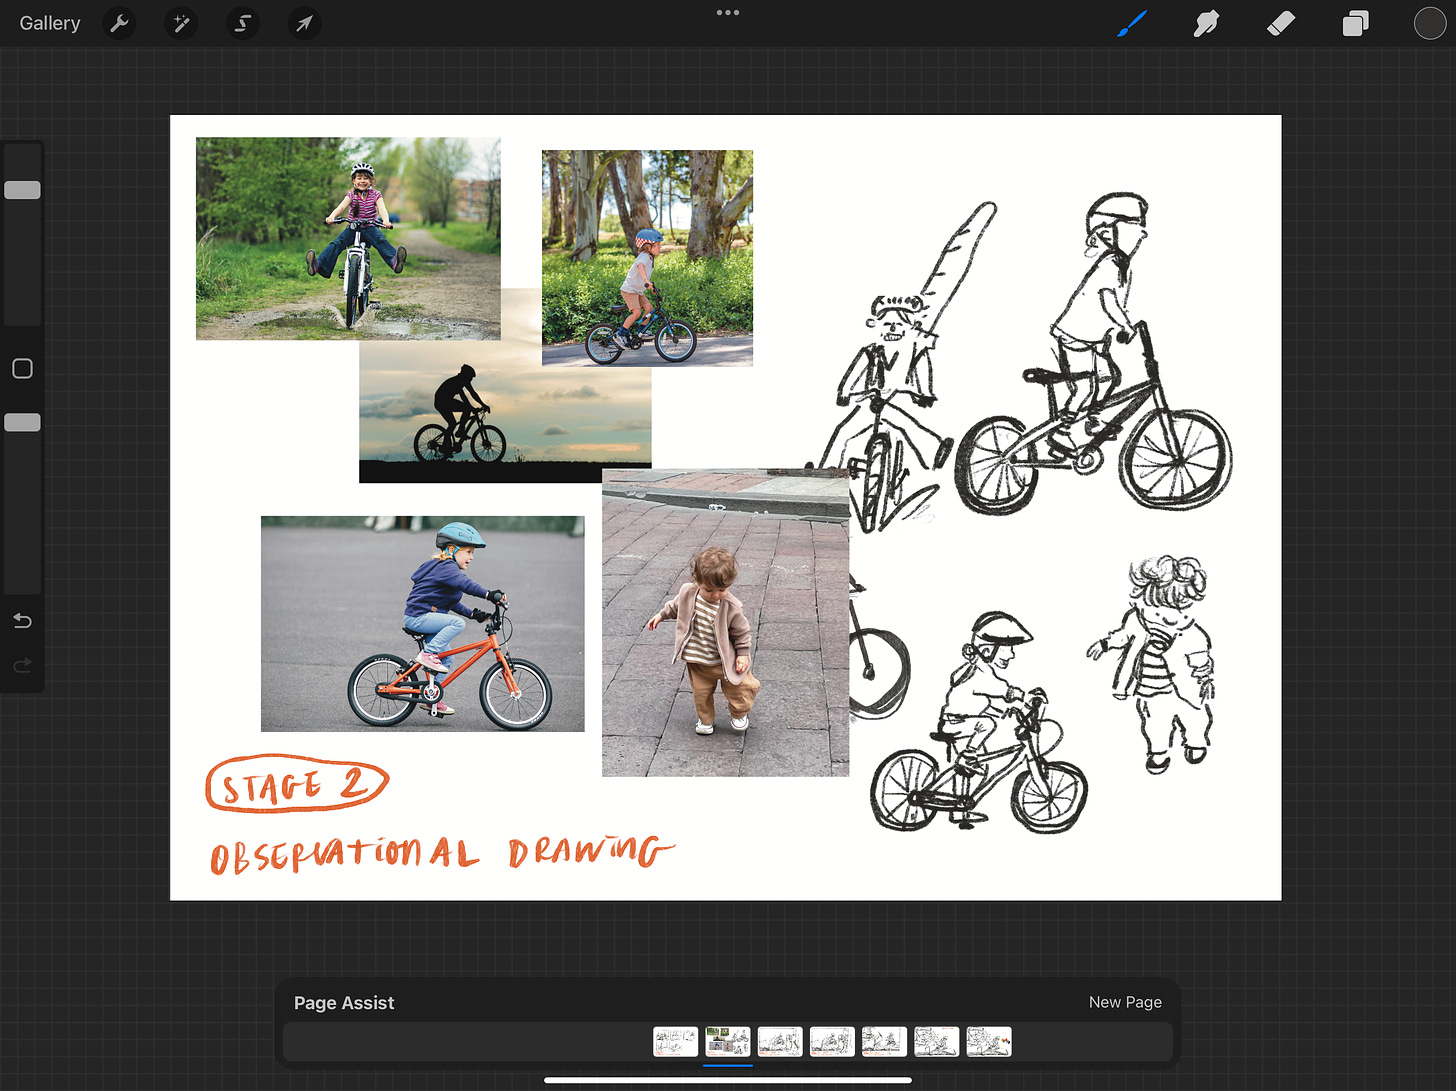
Once you have chosen the thumbnail you want to use, it’s time to do some research and observational drawings.
In my case, I need to look up reference photos of possible cycling poses and the ideal outfit for my character. I usually look for reference photos both on the internet and in my own photo albums. (Unrelated fun fact: I was captivated by a cute baby in a brown outfit in Italy, so I quickly took a picture of him.)
All of the drawings in this step are just preparation and practice for the next step. Although none of these drawings will be used in the final artwork, they are important because you learn how to accurately draw that particular pose or object.
A tip for this step: really LOOK and draw whatever you see.
Step 3 - Imaginary Drawing(without looking at reference!)
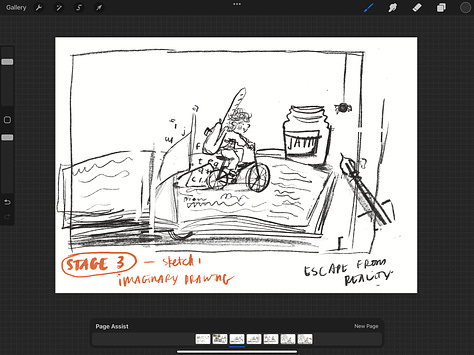
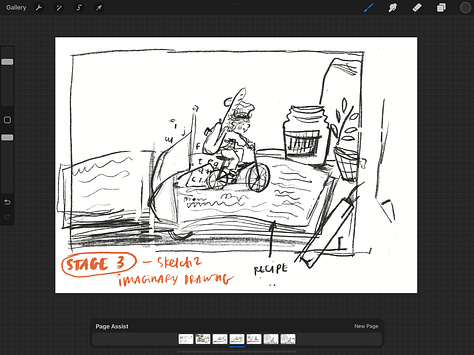
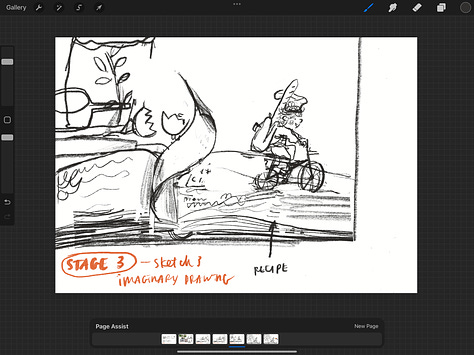
In this step, you start building your drafts without looking at any reference photos or drawings. This can help you develop a unique way to draw.
Illustrations are different from photos and often involve some unrealistic elements. Your drawing might be less realistic and a lot simpler than your observational drawings, but that’s totally fine. Don’t panic. This is the time to find your own creative voice. You draw in your unique own way after spending time to analyse them in the previous step.
If you really cannot remember how to draw one particular object, I suggest you to repeat step 2 for a few more times until you can draw it without looking.
I find these steps similar to writing an essay in university. Instead of copying information word for word directly from a paper, you do your research, digest all the information in your head, and rephrase it using your own words.
One of the advantages of creating digitally is that you can simply move objects around to test out the effect without redrawing the whole thing. I have so much respect for analog illustrators! I cannot imagine redraw the draft for so many times.
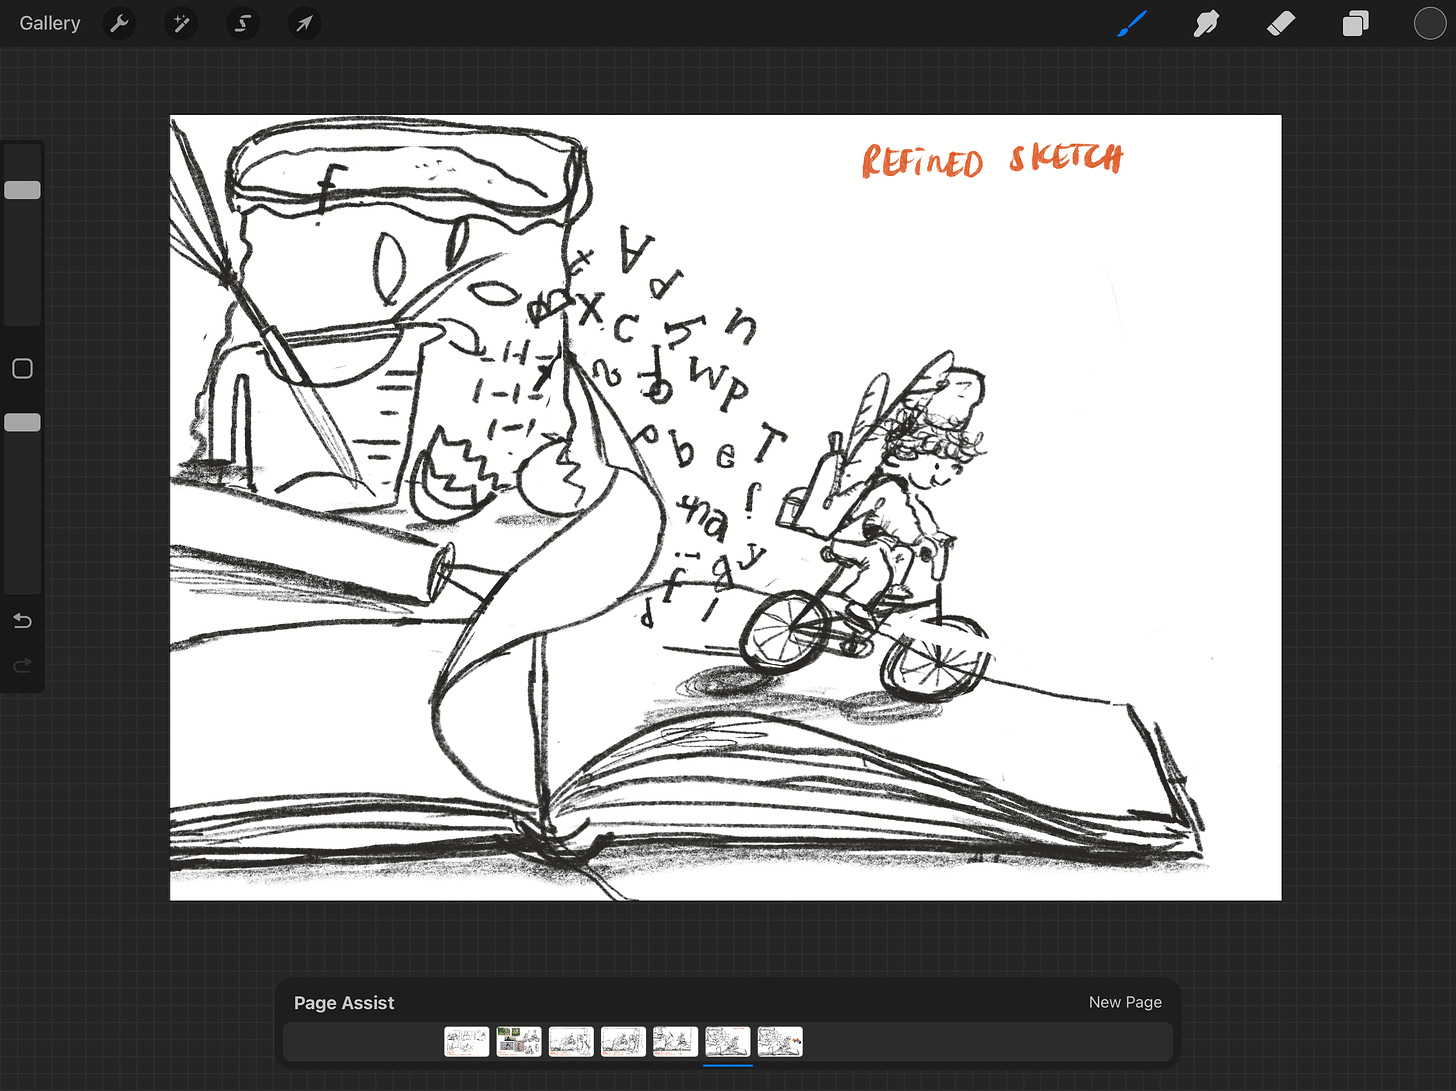
Step 4 Create your Final Sketch!
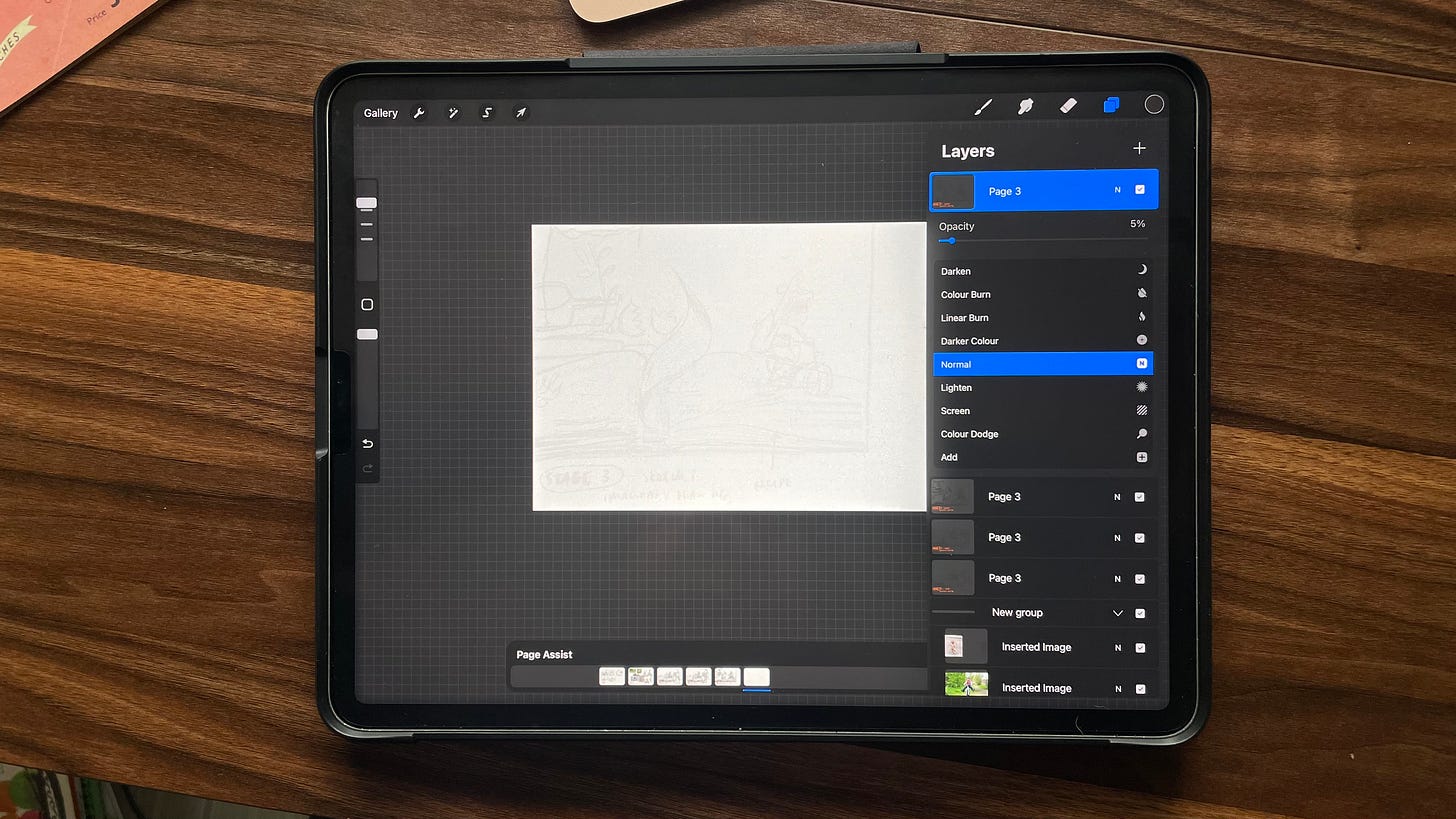
Once you are happy with the draft, you can redraw the final sketch with all the details. I usually lower the opacity of the draft to around 5-10%. Then, I add an extra layer on top of the draft layer and draw the final sketch on it. With the draft opacity lowered, I can only roughly see the composition of each element. This process allows me to rethink and ensure every element in the drawing is exactly how I want it to be. A cleaned-up final sketch will make the drawing process a lot smoother later.
Great job! You have your final sketch now. So, what’s next? Make yourself a cup of tea, go out for a walk, watch a movie, or listen to your favourite song.
Taking a break allows you to step away from your work and come back with fresh eyes, which helps keep the motivation to finish the painting. You might also discover something new that you’d like to add to your painting after that cup of tea!
These are the steps I usually follow to create an illustration. Do you find them helpful? Let me know in the comment!
I'll share the next steps in my upcoming post! Stay tuned!



Love this post Amber - so much i got the pencil & paper out to digest it properly 🤣🤣 thanks for sharing. I didn't think about thumbnailing like taking a photo, super inspiring!
I appreciate the insight into your sketching process. I hadn't ever really thought about practice drawing before drawing without looking at a reference...I can totally see that it would give space for style and play. So helpful. Thanks!